
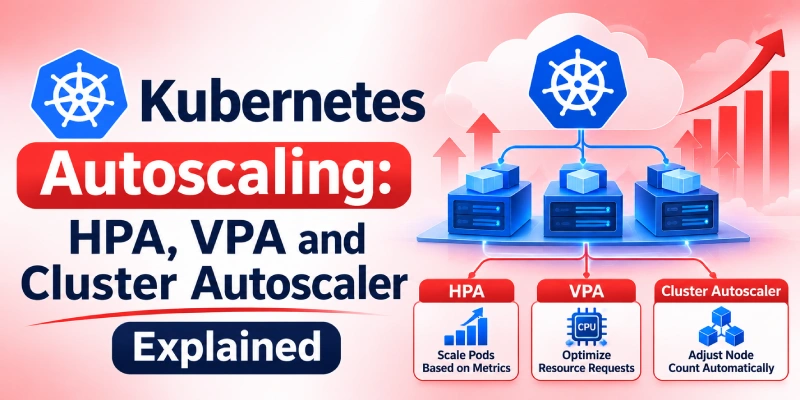
Kubernetes Autoscaling: HPA, VPA and Cluster Autoscaler Explained
Think of a restaurant on a busy Saturday night. When the crowd grows, the manager does three things: calls in more waiters, makes sure each waiter has a sensible number of tables, and opens an extra dining room when the main one is full. Kubernetes autoscaling does the same three jobs for your applications, automatically.
This guide explains the three tools in plain terms: the Horizontal Pod Autoscaler (HPA), the Vertical Pod Autoscaler (VPA), and the Cluster Autoscaler. You will see how each works, how they cooperate, and which mistakes to avoid.
What Is Kubernetes Autoscaling?
Kubernetes autoscaling means the cluster adjusts its own capacity when demand changes, so nobody has to resize things by hand. It does this at three levels, and each level has its own tool:
Horizontal Pod Autoscaler
Changes how many copies (replicas) of your application are running.
Vertical Pod Autoscaler
Changes how much CPU and memory each copy asks for.
Cluster Autoscaler
Changes how many machines (nodes) the cluster has.
Four Terms You Need First
A few Kubernetes words come up constantly, so here is what they mean in this article:
How the Three Autoscalers Work Together
The easiest way to understand the three tools is to follow one traffic spike. Imagine an online shop whose API runs on four pods, with an HPA set to keep CPU usage near 65%. A sale starts at noon:
Traffic Rises
The pods become busy. The HPA sees CPU above its target and raises the replica count from 4 to 8, then 14.
Pods Go Pending
The cluster does not have room for the last few pods. They stay pending.
Cluster Autoscaler Adds Nodes
The Cluster Autoscaler notices the pending pods and adds new nodes.
Pods Start and Share Load
Once the nodes are ready, the pods start and share the load. This usually takes minutes, not seconds.
Scale Down After the Sale
When the sale ends, the HPA slowly removes pods, and the Cluster Autoscaler later removes nodes that are no longer needed.
Notice step 4. Autoscaling is reactive: it responds after demand rises. If a spike arrives faster than new nodes can start, users will see slow responses for a while. We cover ways to reduce that gap near the end.
VPA works in the background of this story. It does not add pods or nodes. It helps make sure each pod’s requests are realistic, which affects both the HPA and the Cluster Autoscaler.
Before You Start: Requests and the Metrics Server
1. Set Resource Requests
HPA measures CPU usage as a percentage of what the pod requested. If a pod has no CPU request, there is nothing to take a percentage of, and a CPU-based HPA cannot work. Requests also tell the scheduler how much room each pod needs.
Many teams set memory limits but leave out CPU limits, because CPU throttling can slow an application down. Either choice is valid, as long as you make it on purpose.
2. Install the Metrics Server
The Metrics Server collects CPU and memory numbers from your nodes and makes them available to HPA. Many managed Kubernetes services install it for you. To check, run kubectl top pods. If that command fails, resource-based HPA will not work. The Metrics Server is built for autoscaling, not for monitoring or history.
Horizontal Pod Autoscaler (HPA): Adding and Removing Pods
HPA looks at how busy your pods are and changes the replica count of a Deployment, StatefulSet or similar resource. By default, it checks every 15 seconds.
How HPA decides the number of pods
The Kubernetes documentation gives this rule: take the current number of pods, multiply by the ratio of the current metric to the target, and round up. Suppose you have 4 pods averaging 90% CPU, and your target is 60%. The calculation is 4 × (90 ÷ 60) = 6, so HPA scales to 6 pods.
Two details keep this stable. First, a 10% tolerance by default means HPA ignores small differences from the target. Second, if you use several metrics, HPA calculates a pod count for each one and picks the highest.
A working HPA configuration
The example below keeps between 3 and 20 pods and aims for 65% CPU. The behavior section controls how fast HPA reacts: it can double the pods every minute when scaling up, but removes at most 2 pods per minute when scaling down.
apiVersion: autoscaling/v2
kind: HorizontalPodAutoscaler
metadata:
  name: web-api
spec:
  scaleTargetRef:
    apiVersion: apps/v1
    kind: Deployment
    name: web-api
  minReplicas: 4
  maxReplicas: 20
  metrics:
  - type: Resource
    resource:
      name: cpu
      target:
        type: Utilization
        averageUtilization: 65
  behavior:
    scaleUp:
      stabilizationWindowSeconds: 0
      policies:
      - type: Percent
        value: 100
        periodSeconds: 60
    scaleDown:
      stabilizationWindowSeconds: 300
      policies:
      - type: Pods
        value: 2
        periodSeconds: 60
Reading it top to bottom: scaleTargetRef says which Deployment to scale, minReplicas and maxReplicas set the lower and upper limits, and averageUtilization: 65 is the CPU target. In behavior, the 300-second stabilizationWindowSeconds for scale-down means HPA waits five minutes of lower demand before shrinking, which prevents pods from being added and removed repeatedly. This is a learning example, not a production setup: replica limits, targets and policies should come from load testing your own application.
Scaling on more than CPU
CPU is not always the best signal. A worker that reads from a message queue might use little CPU while thousands of messages wait. HPA can scale on custom or external metrics, such as requests per second or queue length. These need an adapter, for example Prometheus Adapter, to supply the numbers. Projects like KEDA build on this idea for event-driven workloads. This pattern is common in data pipeline and streaming workloads, where consumers such as Kafka readers should scale with the backlog of unprocessed messages rather than with CPU.
Scaling to zero pods is not standard HPA behavior and has been behind a feature flag, so check the current Kubernetes documentation before relying on it.
Vertical Pod Autoscaler (VPA): Giving Each Pod the Right Size
HPA assumes each pod is sized sensibly. In real projects, requests are often guesses made at launch and never reviewed. Too high wastes money; too low causes slow or crashing pods. VPA watches real usage and recommends better CPU and memory requests.
VPA is not part of core Kubernetes. You install it as an add-on, and it has three parts:
Recommender
Studies usage (read from the Metrics Server) and calculates suggested values.
Updater
Evicts pods whose requests are far from the suggestion so they can restart with better values.
Admission Controller
Applies the new values when pods are created.
Start with recommendations only
The safest way to begin is to let VPA suggest values without changing anything. This is done with updateMode: "Off":
apiVersion: autoscaling.k8s.io/v1
kind: VerticalPodAutoscaler
metadata:
  name: report-worker
spec:
  targetRef:
    apiVersion: apps/v1
    kind: Deployment
    name: report-worker
  updatePolicy:
    updateMode: "Off"
  resourcePolicy:
    containerPolicies:
    - containerName: "*"
      minAllowed:
        cpu: 100m
        memory: 128Mi
      maxAllowed:
        cpu: "2"
        memory: 2Gi
The minAllowed and maxAllowed values keep recommendations within sensible bounds. To see the suggestions, run kubectl describe vpa report-worker, then apply the numbers through your normal review process. Keeping VPA in this mode is a common, low-risk way to use it: you get data-driven numbers and still decide when to apply them.
Other modes, such as Initial and Recreate, apply recommendations when pods are created or by evicting running pods. Historically, changing a pod’s requests meant restarting it. Since Kubernetes 1.35, in-place pod resize is stable: CPU and memory can be changed on a running pod, often without a restart. VPA uses this through the InPlaceOrRecreate mode, which is currently beta. Two caveats apply. Some runtimes, such as Java, may still need a restart before a changed memory value takes effect. VPA may also fall back to evicting the pod if the node has no room for the resize. Check your Kubernetes and VPA versions before relying on it.
Cluster Autoscaler: Adding and Removing Nodes
HPA and VPA work on pods. The Cluster Autoscaler works on nodes, adding or removing them in your node groups, such as cloud autoscaling groups or managed node pools.
When It Adds Nodes
The trigger is a Pending pod that no current node can host. The autoscaler checks which node group could fit the pod, and grows that group.
When It Removes Nodes
If a node is underused and its pods can safely move elsewhere, the autoscaler removes it. By default, a node whose requested resources stay below 50% of its capacity for about 10 minutes becomes a candidate.
Some pods can block removal:
- Pods protected by a strict PodDisruptionBudget
- Pods using local storage, unless annotated otherwise
- Pods that are not managed by a controller
- Pods annotated
cluster-autoscaler.kubernetes.io/safe-to-evict: "false"
Important: the Cluster Autoscaler looks at requests, not live usage. If requests are wrong, it will add too many nodes or too few. Some platforms offer alternatives, such as Karpenter, which creates nodes based on what pending pods need.
Can You Use HPA and VPA Together?
Yes, with one rule. Do not let both act on the same CPU or memory metric for the same workload. HPA measures usage against requests, and VPA changes requests, so they can end up working against each other.
Safe combinations are VPA in Off mode next to HPA, or HPA scaling on a custom metric while VPA manages the requests.
Which Autoscaler Should You Use?
| Autoscaler | Best Suited For | Why |
|---|---|---|
| HPA | Stateless services such as APIs and web frontends | More pods means more capacity. |
| VPA | Workloads that cannot easily scale out — single-instance services, some databases, batch jobs | Also helps anywhere requests are guesswork. |
| Cluster Autoscaler | Almost any cluster whose demand changes | Pods eventually need nodes. |
Common Autoscaling Problems and How to Avoid Them
Requests That Don’t Match Reality
Both HPA and the Cluster Autoscaler depend on requests. If they are missing or far off, every decision built on them is off too.
Pods That Start Slowly
If a pod needs 90 seconds to become ready, new pods will arrive too late for a short spike. Tune your startup and readiness probes.
Scaling on the Wrong Signal
CPU may not reflect queue length, latency or connection counts. If it misleads you, switch to a metric tied to real demand.
Strict PodDisruptionBudgets
An overly strict budget stops nodes from being drained, so you keep paying for capacity you no longer need.
Memory Limits and Unlimited Replicas
A memory limit below real peak usage causes out-of-memory kills, which no autoscaler can fix. An unbounded maxReplicas lets a faulty metric or retry storm scale a service into your quota or budget.
No Spare Capacity
Without headroom or low-priority placeholder pods, a sudden spike hits before new nodes can join the cluster.
Kubernetes Autoscaling Best Practices
- Set realistic resource requests, using VPA recommendations or observed usage.
- Set minReplicas high enough for availability, and maxReplicas as a safety limit.
- Use the HPA behavior field to make scale-down gradual.
- Keep spare capacity, or run low-priority placeholder pods that real workloads can replace when they need space.
- Load test before production. Run load and performance testing that mimics a real traffic spike, and measure how long pods take to become ready and how long new nodes take to join. Watch
kubectl describe hpaand the autoscaler logs during the test. - Review requests regularly. Workloads change, and last quarter’s requests may no longer match reality.
Frequently Asked Questions
HPA changes the number of pod replicas, while VPA changes the CPU and memory requests of each pod.
Yes, if they do not both act on the same CPU or memory metric. A common approach is HPA on a custom metric with VPA managing requests, or VPA in recommendation-only mode.
No. It reacts to unschedulable pods and to node utilization calculated from pod requests, not live usage.
Common causes are a missing Metrics Server, containers without resource requests, or a metrics adapter that is not serving the requested metric.
No. VPA is a separate add-on installed into the cluster, unlike HPA, which is part of the core control plane.
Conclusion
Kubernetes autoscaling works best when you understand how its three layers fit together. HPA decides how many pods to run, VPA decides how big each pod should be, and the Cluster Autoscaler provides the nodes they run on. Start with accurate requests, pick metrics that reflect real load, and plan for the minutes new nodes take to arrive.
Want to learn more about Kubernetes and its capabilities? Explore our website to discover more technical insights, concepts, and best practices in cloud-native technologies.
Explore the Invicktus Blog
